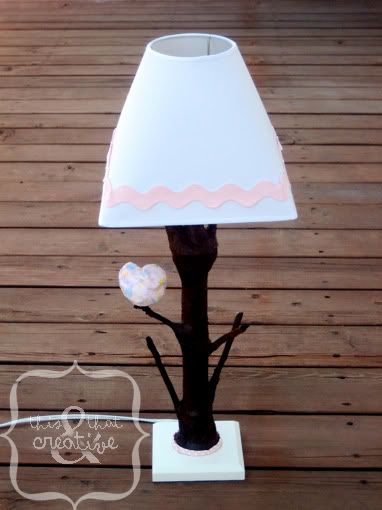
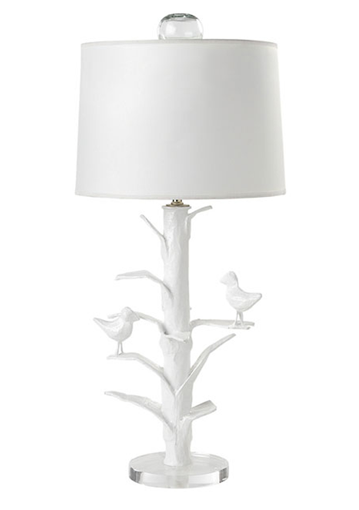
A friend of mine was due to have a baby girl and we had a fun time discussing the bird theme of her nursery. When I saw this lamp I totally thought of her. But...I didn't have $398 to spend on my friend, as much as I do like her. Another thing was that the bedding she had picked out had different pastel colored birds. So, I did my own twist from this on the bird lamp so that it would match the nursery better.
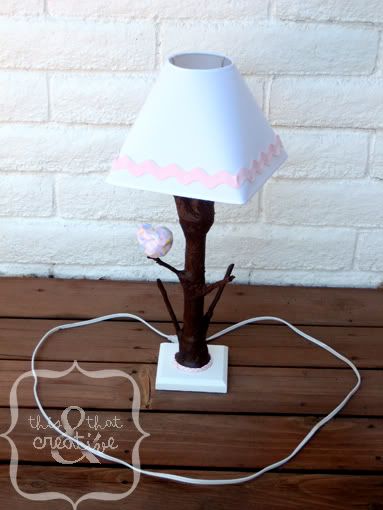
I only have these two pictures to help you out with because I took only two pictures of it with just my point and shoot camera before I gave the lamp away to my friend. I have tried to zoom into these pictures and add some close-up pictures to help you understand what to do with some of the steps. Hope it helps!
You will need:
functioning lamp base
plain lamp shade
Mod Podge
a bunch of paper (the color you want
your tree trunk to be) or you can use newspaper...
but you'll need to spray paint it the right color later
at least 1" wide ribbon, if you want in around the trunk base
thick ric-rac, for around the lamp shade
real sticks, the size you want your branches
hot glue gun and glue/ super glue
a pre made Styrofoam bird (I've seen them at Michaels, and Walmart)...
OR 3" styrofoam sphere
I started out with a white lamp base that I got at a thrift store. It can be any color because you are going to cover the base up. But, the bottom of my lamp base was left exposed because I liked it white. I bought a lampshade at Walmart; I think it wasn't over ten dollars for both. One suggestion that I have is to get a lamp base that is straight, without a bunch of curves. I didn't, and I had to work hard to make it look smooth.
1. First off, hot glue your sticks in the places that you want your branches to come out. You might have to build up some glue beneath the spots so it will hold it in place better by letting some glue dry, then putting more hot glue around that, etc. Super glue wouldn't hurt either. It can look as messy and unprofessional as you can handle because you are going to cover this up.
2. (Optional) One thing that I might do, if I made this lamp again, would be to add leaves. You could use false leaves with wires from the floral department at a craft store, or you could make your own. I would then hot glue the leaf wires to the sticks I just glued on, placing the leaves where I want them.
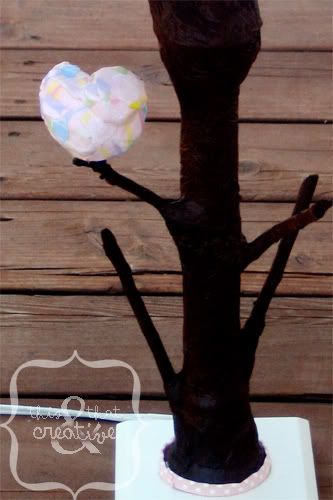
3. Here is the fun and messy part. I used pieces of newspaper and Mod Podge to decoupage around the lamp base to make a tree "trunk" shape. You just cover the piece of paper with the Mod Podge and stick it on there and repeat with the next piece. You put on your first layer, covering even the sticks, then wait for it to dry. (See step 4, for something to do while it's drying). Repeat. If any of you have ever made a pinata before, you know what I am talking about. For the easy way, use just a bunch of pieces of paper that are the color that you want your tree trunk to be, then you won't have to spray paint it later like I did. Funny, the people that do the project after me, always end up with the easy way to do things!
Here is a close-up of the trunk:
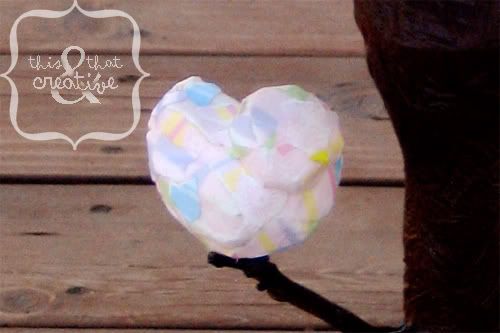
4. One thing you can do while one layer is drying, is make your bird. I carved my bird out of a 3" styrofoam ball (I was feeling adventurous), but you can actually get a little bird pre made with feathers, etc. everything attached on it, if that is the look you are going for. You will want to decoupage your bird, if you didn't choose the pre made bird, just like you did to your lamp. I picked out cute little pastel scrapbook paper that matched my friend's nursery to use to for my bird. You only need enough layers to get the look you want.
5. When everything is dry and you are happy with the way your trunk looks, you can glue your bird on a branch. You can't afford to be messy here, so super glue may come in handier than hot glue. If you did use newspaper like I did instead of the color paper, don't put your bird on just yet! Do this first:
Tape off everything that you don't want sprayed the color of your trunk. Spray paint your trunk the color you want, and then let it dry. Then you can put your bird on.
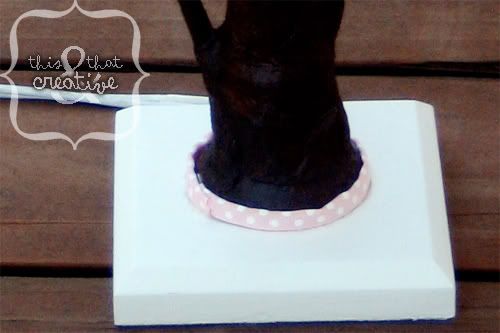
6. Now take your ribbon and roll it horizontally and glue it around the bottom edge to give your trunk a finished look. Cut off any extra ribbon.
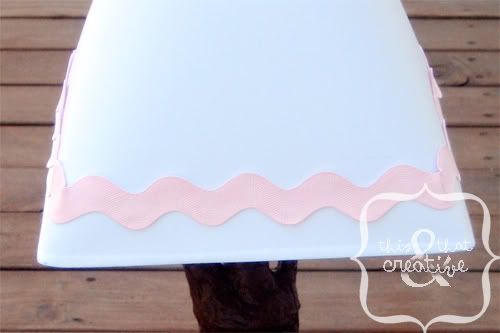
7. Now take your ric rac and glue it around the lamp shade.
Add a lightbulb, attach the lampshade and Viola! A Nursery Bird Lamp!
Linked up with:


