I love Kojo Designs blog! They are two amazingly creative ladies! And they have a pretty incredible Etsy shop too!

I know the perfect guy who would love this!
And they have Kojo Baby with the cutest little outfits.
But Kristin and Jordan really don't need an introduction - they're sewing superstars! And I'm so excited that they agreed to share their famous Anthro Blanket tutorial!! Thank you girls!
Before we get started piecing a PILE of knotted squares together, do you want the backstory on this little Anthro-inspired gem?
First, you should know that I'm a bedding junkie. I LOVE wandering through Pottery Barn, Restoration Hardware, Crate and Barrel, Anthropologie (at Park Meadows in Denver, those stores are all conveniently located near each other as well) to see their bedroom displays. My ever-changing bedding crushes are a constant around here.
So a few years ago, I found this Thai Silk Bedding at Restoration Hardware and fell in love. I have a bad habit of loving expensive things, and this was no exception. We were still in the dual-income-no-kids category at that time and so Adam surprised me with the dream-bedding. *Note, I tried to find a picture for you, but turns out five year old bedding isn't very popular in google images. ;)
Fast forward to this fall when my oh-so-beautiful Thai Silk Bedding RIPPED. Yep, you read right... it was destroyed, not functional and, worse, not fixable! Since the era of able-to-splurge-on-bedding-we-love is long gone, just replacing the duvet cover is not exactly an option anymore.
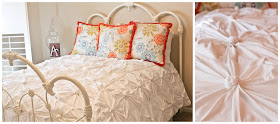
But then, of course, I went and fell in love with the rosette bedding at Anthropologie. It shares all sorts of things with my Thai Silk Bedding... it's beautiful, and lovely, and totally out of our price range. Isn't that how things go?
When I saw the rosette bedding at Anthro, I had this idea in the back of my mind that perhaps I could try to make my own vision of knots and loveliness... but shelved it to pursue more immediately important matters (like tending to a new born baby, and creating things for sytyc, and getting ready for the parties I was throwing, and trying to stay somewhat on top of normal life). And then we made it to the Wild Card finale for So You Think You're Crafty. What better chance to try out my crazy bedding-making idea?
And thus the Anthro-Inspired Knotted Bedding was born. Thank you, So You Think You're Crafty, for giving me a chance to attempt something I might not have otherwise. My husband thanks you too. Because instead of spending $400+ on the quilt at Anthropologie (or, more likely, settling for something we didn't love nearly as much), I made this little getup for around $30. Glory, sheer glory.
Ok, now onto the tutorial. :)
To put your 'quilt' together, you'll need:
-56 knotted squares from part 1 (for a king sized quilt)
-a king sized duvet (I got the thinnest one I could find at Ikea... it was $29... fabulous!)
-sewing machine and supplies
-TONS of pins
1. Start by piecing one row of squares together at a time. Your finished product will have eight rows of seven squares. Here's the thing- in order to achieve that wonderful, gathered look, you have to create the gathers as you go. I did this by pinning little pleats in place before sewing squares together. To be more specific, I pinned five pleats along the length of each square (one tip- if you pleat both squares and pin, this will go more quickly). So, pleat, pin (right sides together) and sew.
2. Repeat and repeat and repeat until you have eight rows of seven knotted squares.
3. Now, you're going to sew the rows together to make a big square-ish mass of knotted squares. It was easiest for me to pin first where the edges between squares met up and then pin more pleats in place. Remember, every time you sew two squares together, you have to 'create' little gathers. As you're sewing the rows together, this means that you have a lot of pinning to do before you sew. Also, be sure to pin the sides right sides together. When you're finished you'll have the top part of your 'quilt.'
4. Lay out your duvet. Place your quilt with the right side (the side with all of the knots) facing down on top of the duvet. Be sure to match so that the longer side of the duvet is lined up with the row of eight squares and the shorter side of the duvet is lined up with seven squares.
Pin all the way around the edges, again, pinning pleats in place. Lucky for me, my duvet was divided into seven sections that matched up with my squares, so that was a good guideline on the short edge to make sure I was pinning evenly. On the long edges, I folded my duvet in half and marked where the middle would fall then folded it in half again and marked the quarters (on both long edges). This became my guide for even pinning on those edges.
Sew around the entire perimeter, leaving one square open. Pull the duvet through the one open square, turning the whole thing right side in. Sew your one square opening shut.
*Note- I can't say this enough, go over the ENTIRE quilt and make sure you got all of your pins out. Once you sew this baby shut, you don't want little pins pricking you. And they like to hide in the pleats, so check thoroughly!
5. Fluff your almost quilt. It almost looks right, doesn't it? Almost done! Now you're going to pin your rows in place and 'stitch in the ditch' (I followed this tutorial on youtube- haha!) so that your squares stay put and don't shift all over the place. I sewed down every other row, but feel free to do as many as you please.
6. Can you believe it? You're done! Put this vision of loveliness on your bed and admire!
I am working on shams... I'll put a tutorial together when I get those done! Also, if you're looking for part 1, it's here.


Umm...I LOVE this! It's absolutely STUNNING. Seriously. I'm so excited to make it one day!
ReplyDeleteThis is just Gorgeous! Seriously, I am so glad to get the how-to!
ReplyDeleteI just HAVE to make this! Its wonderful!! Thanks for the tutorial!
ReplyDeleteI was just totally fascinated when I go along with all those beautiful contribution of great designs. i can't help my self fall in love with your uniquely impressive designs that was totally cute and cools.
ReplyDeleteEverything is boldly stunning! I truly appreciate your passion and creation for making and touching these perfectly awesome idea for blanket! And the blending and matching of colors was just too emphasized that would truly attract everyone.
ReplyDeleteReally nice And informative post! i really like the way you express your thoughts! keep it up!
ReplyDeletewool outlast blanket
michael kors outlet
ReplyDeletereplica watches
tods outlet
nhl jerseys
louis vuitton neverfull sale
air max 90
ed hardy tshirts
jordan pas cher
foamposite shoes
bottega veneta outlet online
valentino outlet
louboutin pas cher
nike free running
oakley sunglasses
louis vuitton outlet
polo ralph lauren
michael kors handbags clearance
uggs outlet
louis vuitton handbags
moncler outlet
ugg boots
nike huarache
polo shirts
nfl jerseys wholesale
louis vuitton outlet
michael kors outlet clearance
mont blanc pens
uggs clearance
reebok shoes
christian louboutin online
the north face jacket
ray ban sunglasses
tiffany and co
michael kors uk outlet
coach outlet
20160827caihuali
kobe byrant shoes
ReplyDeletenike shox
kobe sneakers
coach outlet store
golden goose
golden goose
jordan 12
salvatore ferragamo belt
hogan outlet
fila disruptor