Monday, February 28, 2011

Blanket Party w/ giveaway

Gabe's Gifts
Hey guys!  It's the end of the month - which means blanket party time!   Don't forget each Monday you can see a special blanket tutorial at Today's Top 20, We're the Joneses, and here at This & That Creative

For anyone new - I'm Amanda.  I've started a blanket drive this year to raise blankets for Project Linus.  Why?  To donate blankets in my son Gabe's name.  I lost our baby in August due to a miscarriage.  I really wanted something positive to be associated with his name.  And giving back is the best way to do that.

Project Linus is such a great organization.  They donate handmade blankets to kids (newborn - teens) who need them the most.  I'm really happy to be working with them.

March is going to be a really hard month for me.  My due date was actually my birthday - March 14.  So I'm hoping to make a blanket drop off.  If you have any blanket that you would be willing to donate - please send them my way! {You can email me at amandablogs(at)yahoo}


Here is one of the receiving blankets I made with the help from Raspberry Creek Fabric.  She really went above and beyond - sending me super cute flannel for 4 blankets!  THANK YOU! :) Make sure to check our her shop for super cute prints!
And I have a taggie blanket ready.  This was thanks to Sew It Up Fabric.  She has kits that come with the adorable fabric, minky and ribbon all ready to go.  The instructions are super easy.  This was such a fun, quick project!

  So link up any blanket project you've got.  Mail me your blankets to get donated.  Email if you are interested in guest posting a blanket tutorial (it will be seen on Today's Top 20, We're The Joneses and here at This & That Creative). 

Can't wait to see your projects!!
I'll pick one project using random to send out a little package of my favorite crafty things so make sure I'm able to get your email address! :)

Friday, February 25, 2011

Tie Dye Cake

 I picked this little skill up from a cousin of mine and I LOVE it.  How cute and creative are tie dye cupcakes/cakes?  You can easily personalize the colors for a party's theme, bridal colors, etc.
 I separated my prepared (and rather white) cake batter, then dyed it with food coloring.  I made this batch for a Valentine activity, but I have also done rainbow ones.  You could pick whatever colors you like.
 Just spoon the batter into your pan/cupcake wrappers.  It doesn't need to look pretty.
Once baked, they look like this!  I also took it to the next level and dyed my frosting.  Again, I just filled my piping bag spoonful by spoonful with the different icing colors.  As a tip--refrigerate your icing BEFORE filling your piping bag as well as AFTER so the colors don't blend themselves together too quickly.

Thursday, February 24, 2011

Nursery Inspiration Boards

My best friend is due with her first baby in August.
She doesn't find out what she's having for another month
but that doesn't stop us from getting started on the
nursery design process.
She lives in this great little apartment outside San Francisco
and the baby's room has these floor to ceiling windows
which are amazing! Unfortunately it's a rental so paint
isn't really an option, so I decided to design with some bold
colors for the furniture and accessories so it livens up the space.

Here are the inspiration boards I designed for her:
Bright, fun, playful, and a little bit whimsy with the
owl details and the banner.

And for the boy:
I went with a natural and woodsy feel, but also a
bit of whimsy with the cardboard deer head.
The vinyl "forrest" is also a great alternative to paint.

Inspiration boards are a great way to put ideas together
before buying items for a space. If they don't look good
next to each other on the computer screen then they won't
work together in a room.
I can't wait to find out what she's having so
the shopping can begin!

Wednesday, February 23, 2011

Cloth Diaper Tutorial

I'm about to have another baby, and I have been considering cloth diapers for quite some time. I found some statistics that finally cinched the deal for me:

*Disposable diapers contain traces of Dioxin, an extremely toxic by-product of the paper-bleaching process. It is a carcinogenic chemical, listed by the EPA as the most toxic of all cancer-linked chemicals. It is banned in most countries, but not the U.S..1

*Disposable diapers contain Tributyl-tin (TBT) - a toxic pollutant known to cause hormonal problems in humans and animals.2


*In 1988, nearly $300 million dollars were spent annually just to discard disposable diapers, whereas cotton diapers are reused 50 to 200 times before being turned into rags.4

*No one knows how long it takes for a disposable diaper to decompose, but it is estimated to be about 250-500 years, long after your children, grandchildren and great, great, great grandchildren will be gone.5

*Disposable diapers are the third largest single consumer item in landfills, and represent about 4% of solid waste. In a house with a child in diapers, disposables make up 50% of household waste.5

*We estimate that each baby will need about 6,000 diapers7 during the first two8 years of life. The following estimates are based on prices in San Francisco, California.

*Disposables. For these calculations, let's assume that a family needs about 60 diapers a week. In the San Francisco Bay area, disposable diapers cost roughly 23¢ per store-brand diaper and 28¢ for name-brand. This averages to 25.5¢ per diaper. Thus the average child will cost about $1,600 to diaper for two years in disposable diapers, or about $66 a month9.

After seeing these statistics, I decided to give them a go. I wasn't interested in prefolds, and buying the ready made diapers is expensive, so I decided to figure out how to make my own.
I started by making a pattern using a size 1 diaper. I figure I'll make 15 about size 1, and then I'll make 15 about size 3, and that should last me.

Then I cut the fabric. I chose a really soft cotton fleece, and that kitten fabric you see will be on the inside of the diaper. It was super cheap, and even though I don't love it, no one will see it. I cut 2 of each kind.
Next, I made a soaker by cutting 6 layers of the cotton, and I sewed it to the kitten fabric only.
Next, you sew the white and the kitten together and turn it to make a finished edge.
Next comes the elastic down each side. Make sure to stretch it, so it will conform to baby's leg.
Last, comes the Velcro. I sewed a long strip to the middle, so the diapers can grow with baby, and then I sewed a square to each of the sides. (This picture was taken before the edge was finished, so that's why there is still a rough edge.)
And then you fold it all together! This way, I don't have to deal with prefolds and plastic covers, and the like.
Let me know what you think. Would you cloth diaper your child?

Tuesday, February 22, 2011

Wall Art From Paint Samples

So I was a judge over at Today's Top Twenty's Blogger of the Month competition, and I just have to say that I fell in love with Life, Crafts, and Whatever's Paint Chip Wall Art. I thought it was brilliant. I am so into doing my own art.

I am a frequent Home Depot drop in so I totally swiped some paint samples and made my own version. I think I got the board for close to $4. I had the Mod Podge, stain, and metalic paint so this was super cheap to make. I didn't even have to cut the board because I had found the perfect size.

You just cut and glue down your pieces how you want on the board. Cover them with Mod Podge using a paintbrush (a few layers--letting dry in between layers) and then use wood stain (a dark color so it shows up) and let the stain fill into the cracks, wipe away and let dry (a few times). I covered it with one last layer of a mixture of metallic paint and Mod Podge and let it dry and then hung it on the wall! Visit Life, Crafts, and Whatever's post about it for a more detailed how-to.

Here's mine!


I didn't have the paint chips glue on super tight, so there are some edges that pulled away, but I didn't mind at all. I like the distressed worn look of it. I'd love to do a lighter version with spring colors and whites, but skip the staining. It would also be fun to do a monochromatic one, and have contrasting vinyl words across the board.

Monday, February 21, 2011

Blogging/Etsy Tax Tips

I know it is Monday and it's usually blanket day, but I thought that this was something you would all be interested in!  And if you already filed your taxes this year, keep records for next year!
If you make money blogging or on Etsy you have to (ok.  You really should) claim it on your taxes.  Congrats!  You are a business owner! :) There are lots of deductions you can write off.  I'm not an accountant, so you should talk these over with yours but here are some general things that can help you save some money.
1. Internet related expenses.  Without the internet - there would be no blog right?  Hosting fees, domain name registrations, internet access, blogging software, picture storing, linky party subscriptions are all things that fall into this category.  Don't forget selling fees - Etsy, pay pal, Ebay.  
2. Your equipment. You need a computer right?  Any upgrades (memory and so forth), software (including tax software, picture editing).  And don't forget those cameras, sewing machines, and silhouettes!!
3. Do you tweet from your cell phone?  You can use part of your cell bill as a write off.
creative-office-design-idea-a1
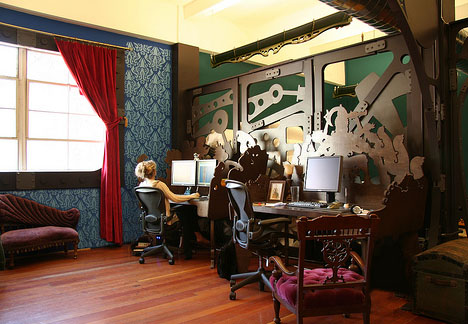
4. Any new office furniture?  {My table from the trash would not count here lol}
5. Supplies/Stationary.  Supplies add up quickly.  Fabric, thread, needles, pins, rulers, cutting mats, pens, staples, paint brushes, Stamps.  Keep all of your receipts.  Your accountant can help you go through all of them.  I write notes on mine so I know exactly what project I bought each item for.  If it's something like Mod Podge I just write general.
6. Advertising, Promo and Design.  Do you advertise on other blogs.  Ask for a receipt or print off your pay pal receipt.  Advertising also include promos and giveaways! Did you have someone design your blog.  Print off a receipt! 
7. Travel and Entertainment.  Did you go to a blogging conference?  Conference fees, travel accommodations, and dining expenses can be written off. 
8. Office Space.  Do you blog from home?  Do you have an office?  You can deem that part of your home as your office and write off a small amount of your household bills for rent plus your utilities.
I know.  It's a lot!  Just remember to save your receipts!  Make small notes on them.  I put all of my receipts into a big folder and at the beginning of each new month I sort them and staple each category together.  I also try to keep Etsy/blog stuff away from my personal stuff when I check out somewhere.  For example I was buying tablecloths and towels for an order at Target but I also had milk and a movie.  Just have them ring it up as 2 transactions.  

I also keep a sales order book on my desk.  (You can get them anywhere).  Every time someone orders something or pays for advertising I write it down.  I keep all of the receipts in the book.  I also write how I got paid (pay pal, cash, check).  Keeping them in one place makes it easy to have them ready to go!    

Any tips you have for tax time?

Sunday, February 20, 2011

Spotlight Week is Coming: Nominate a Blog!

Our first Creative Spotlight Week is coming up! It will be February 28th-March 4th. Each of our contributors will be selecting a blog or blog post that stands out from the crowd to receive our Spotlight Award and will be featuring it on their day of the week.

Each selection for this award will documented in our Spotlight Award Archive (coming soon!) with a link back to their blog/blog post as well as be directed where they can grab a button to display on their blog that they have received this award.

If you know of a blog or blog post that deserves some recognition, let us know! Just click on the button in our sidebar to the right and it will take you to a page where you can anonymously enter in the blog's address for us to consider as a candidate for this award! It's as easy as that! There is no guarantee that your nomination will be selected, but we'd love your input!

Saturday, February 19, 2011

DIY Paper and Greeting Card

Today we would like to welcome our guest blogger, Maria, with a great creative DIY tutorial on how to make your own paper/card and recycle all that stuff you normally might just throw away!

If you’re a waste-not-want-not kind of DIYer, try making your own paper. Turn your junk mail into greeting cards! Moreover, since you can’t recycle most types of milk or juice cartons, you can keep them from ending up in landfills and instead surprise someone on his or her birthday. (See other things you think can but actually can’t recycle here: http://ecosalon.com/10-surprising-things-you-cant-recycle/#heading.)

If you are going to make paper out of milk cartons, a word of caution: most types are coated with some kind of plastic or wax. To get the paper soft enough, you’ll have to boil it, which will create a small degree of fumes. To this extent, I advise sticking to junk mail or paper scraps, but if you want to put your cartons to use, simply open a window near the kitchen and run a fan.

Materials

  • Scrap paper
  • Water in a pot to boil (if you're using cartons)
  • Blender
  • Frame with netting. Use an old picture frame or:
    • Four pairs of wooden chopsticks
    • Super glue
    • Netting, such as the one you get when you buy lemons
  • Several towels
  • Ribbon 
  • X-acto knife
  • Glue stick
Directions

1. Cut up your scrap paper into pieces roughly one cubic inch. Keep in mind this is not an exact art, but it helps the look of the final product if you stick with scraps of the same color group. If there are words on your paper, take care to remove words like calories, cholesterol, taxes, and other things people don't like to think about when they receive a card!

2. If you're working with normal paper and not cartons, put the paper into an electronic blender with lots of water and blend until pulpy. The time will vary depending on the weight of the paper itself.

3. If you're working with cartons, you'll have to boil it first. Fill a pot with water and add the scraps. Partially cover with a lid once at boil and lower the heat to a low, steady simmer. Remember to open a window. Once the paper is soft enough, blend it thoroughly. You may have to do this a few times.

4. Put all of the pulp into a basin with water enough to move the pulp liberally around.

5. For the wooden frame with netting, you have two option: you can use an old picture frame (plenty to be had at the thrift store) and stretch some netting across it, or go DIY all the way. Get four wooden chopsticks from an Asian cuisine restaurant. Break them apart as evenly as you can (hold them closer to the middle than at the bottom when breaking). Place netting such as from produce between the pair of chopsticks and super-glue together. Continue until you create a frame.

6. Slide frame into pulp basin and shake around until you have a decent layer of pulp. Move around the colored bits of paper as you wish them to appear in the final product. Press excess water out with your hand very gently, and do the same with a small paint roller or (if you're cheap like me) a plastic spoon you got with your Asian takeout. If you accidentally move around the pulp, you can always dip the spoon into your pulp basin and pour more in the netted frame to fill the gap. 
7. Place the frame on a towel and use another towel to gently and use another towel to gently press more water out.

8. On a flat surface, prepare to remove the pulp from the frame by laying another (dry) towel on top of the frame and turning it upside down onto the flat surface. Dry overnight and most of the next day.
9. If you want to make a folded card, fold the paper in half before it's fully dry so it doesn't crack.

10. Once dry, place paper between heavy books to flatten.

11. To make a greeting card, take an X-acto knife and cut the width of a ribbon in the fold of the card. Slide ribbon through.
12. Cut enough ribbon to wrap vertically around the front flap of the card and glue in place.

13. Tie the other ribbon into a bow on the front flap of the card. 

Bio: Maria Rainier is a freelance writer and blog junkie. She is currently a resident blogger at First in Education where she writes about education, online degrees, and what it takes to succeed as a student taking online programs remotely from home. In her spare time, she enjoys square-foot gardening, swimming, and avoiding her laptop.

Friday, February 18, 2011

Cake Mix Cookies

***EASIEST COOKIE RECIPE EVER!!! Kids can make them!***

1 box cake mix, any kind (use Devil's Food for Homemade Oreos)
2 eggs
1/3 c. oil

Preheat oven to 350*. Mix ingredients together with spatula/wooden spoon until thoroughly combined. Drop onto cookie sheet and bake for 7 minutes. Cookies will have soft centers, so leave them on the cookie sheet for a couple of minutes for carry-over cooking. These can be eaten as-is, frosted, or in "sandwich form" with frosting in between two cookies. For homemade Oreos, use Cream Cheese frosting.

Thursday, February 17, 2011

DIY Embellished Flip Flops

I know it's not quite flip flop season yet, but they are now in
stores, so I guess the warm weather will be here soon!
I love the embellished flip flops that I've seen at Gap and
JCrew, but I don't like the price! They are usually about $20.
I decided to make some of my own.
I started off with $2.50 flip flops from Old Navy and
added my own embellishments.


For my little girl I made tulle flowers with a rhinestone
center, which I had on hand, so total cost $2.50

And for mine I bought some giant $3.50 earrings from
Forever 21 and glued them on! Total cost $6

The possibilities with these are endless, and I
definitely plan on making more!

Tuesday, February 15, 2011

Custom Fabric

My little boy loves airplanes. Anything that resembles an airplane, he repeatedly exclaims, "Airpay!". Well, I've talked my husband into making him an airplane bed for his 2nd birthday when he will get his big boy bed. It's times like this that I don't mind that my husband bought, yet again, another expensive tool.

My husband still has a blanket that his mom made for him when he got his big boy bed. In fact, he still sleeps with it, and I am not allowed to take it off the bed when I make the bed in the morning (haha---hopefully he doesn't mind that I shared that). Well, I want to carry on the little tradition of a new blanky when our little guy turns 2.

I've been looking for airplane fabric for the new blanket. The stuff that I like is completely out of stock everywhere that I've seen it listed. So, I thought there had to be a way to somehow get what I was looking for.

Then I stumbled upon Spoonflower. That's when I decided that this was way better than the fabric that I liked anyway. Now I can make my own design and am able to incorporate Tucker's name into it. How much more personalized can you get? I love it. Here are a couple designs that I came up with in Photoshop and then uploaded them to Spoonflower. Once you upload your design, you can choose how you want your design to repeat and preview what it will look like when printed on the fabric.


tuckerFabric2


tuckerFabric


Spoonflower also has an area where you can see others' custom designs and some of them are available for you to order too. Here are some that I was eying!


Blue and Lime Green Birds and Cages

Cotton Plant

Retro Travel in Bright Aqua

vine_and_leaf

There are a few places besides Spoonflower where you can customize your own fabric.  Fabric on Demand also uses the same idea, and their prices are pretty comparable. Fabric on Demand was just barely a little cheaper starting at $16.25 a yard and up depending on what kind of fabric you want to print your design on. Spoonflower's started at $18 a yard and up, but if you upload a design on your own, you get 20% off. So they come out to be about the same if your doing your own design. Yes, it is more expensive than most fabric, but if you really can't find what you are looking for then I think it is worth it!

When I was looking around for other ideas, I found a great tutorial from Cynthia Howe Miniatures on how to make your own custom fabric, by using your own home computer printer. Obviously you would only be able to print fabric as wide as your printer can print, but that would be just fine if you are doing a quilt and are going to piece the fabric together anyway. Cynthia uses this way for printing fabric for doll clothing because most fabric is made in scale for humans.

Needless to say, I am so excited to get my custom fabric and start on sewing this new blanky!

Monday, February 14, 2011

Blanket Tutorial

So this week I wanted to do a blanket! I made it about a week ago.  And I went to upload my pictures and <duh>.  I had to erase them when I put my memory card in....

<cue cheesy game show music>

my BRAND..... NEW.....CAMERA. {Crowd cheers.  Or at least I do.}

Yup.  Happy Valentine's Day!  Andy got me a Nikon D3100.  And I love it.

So it's a good thing it's as basic as basic gets.  Maybe just something you wouldn't have thought of to do.

Is that a table cloth?  Why yes it is.

And all you do is take a table cloth (I got this one at Target for about $4 on clearance.  The thicker ones work best!)

Lay it out right side up.  Take a piece of fabric (I used 1 yard of fleece...I stocked up when Joann's had it for $3 a yard!!) pin it together.  Sew leaving a small opening.  Trim your corners.  Flip and sew it up.

Sound boring?  No way!  This is perfect for storing in your car.  Put the tablecloth side down when you take the kids to the park.  Your blanket won't get all muddy.

Do your kids play sports?  Well, it always seems to drizzle when it's game day.  Put the fleece side down to keep you warm and when the rain hits the tablecloth side it keeps you dry!

Kids having a sleepover and want to eat in the living room in front of the TV?  Put this down tablecloth side up!  No juice spilling on your carpet.  Wipes right off. 

MACHINE WASHABLE (make sure you check your tablecloth package to double check!)

I love these blankets!


Friday, February 11, 2011

Valentine's Day Meal Part II

Now for my very favorite salad in the whole wide world (seriously, we eat this almost weekly) and the chocolate covered strawberries!

BACON FETA SALAD
1 pkg. Spring Greens (or your favorite greens mixture)
1 carrot, diced
3 celery stalks, diced
1/2 seedless cucumber, sliced
1/4 red onion, sliced
handful of cherry/small heirloom tomatoes (you could dice a large tomato as well)
1/4 c. Craisins (dried cranberries)
chopped pecans/walnuts
4 oz. crumbled feta cheese (I use the basil tomato feta)
6 slices of bacon, cooked and crumbled (omit for veggie version)
croutons

Toss it all together and serve fresh!  I like to use a blueberry pomegranate or balsamic dressing, but just about any type of dressing would be delicious.  Obviously, you could omit any of the veggies you're not so fond of, or add some different ones if they're just sitting in your fridge.


Ingredients

  • 6 ounces semisweet chocolate, chopped
  • 3 ounces white chocolate, chopped
  • 1 pound strawberries with stems (about 20), washed and dried very well

Directions

Put the semisweet and white chocolates into 2 separate heatproof medium bowls. Fill 2 medium saucepans with a couple inches of water and bring to a simmer over medium heat. Turn off the heat; set the bowls of chocolate over the water to melt. Stir until smooth. (Alternatively, melt the chocolates in a microwave at half power, for 1 minute, stir and then heat for another minute or until melted.)
Once the chocolates are melted and smooth, remove from the heat. Line a sheet pan with parchment or waxed paper. Holding the strawberry by the stem, dip the fruit into the dark chocolate, lift and twist slightly, letting any excess chocolate fall back into the bowl. Set strawberries on the parchment paper. Repeat with the rest of the strawberries. Dip a fork in the white chocolate and drizzle the white chocolate over the dipped strawberries.
Set the strawberries aside until the chocolate sets, about 30 minutes.
I got my chocolate-covered strawberry image and recipe from HERE.  I won't lie.  I'm pretty stoked to eat dinner on Valentine's Day.

LinkWithin

Related Posts with Thumbnails